I’m using the mappings to In bus B-L for sensor 3, but honestly, I tried the top 8 or so possibilities and none brought through any signal.
Hey @crisbeasley,
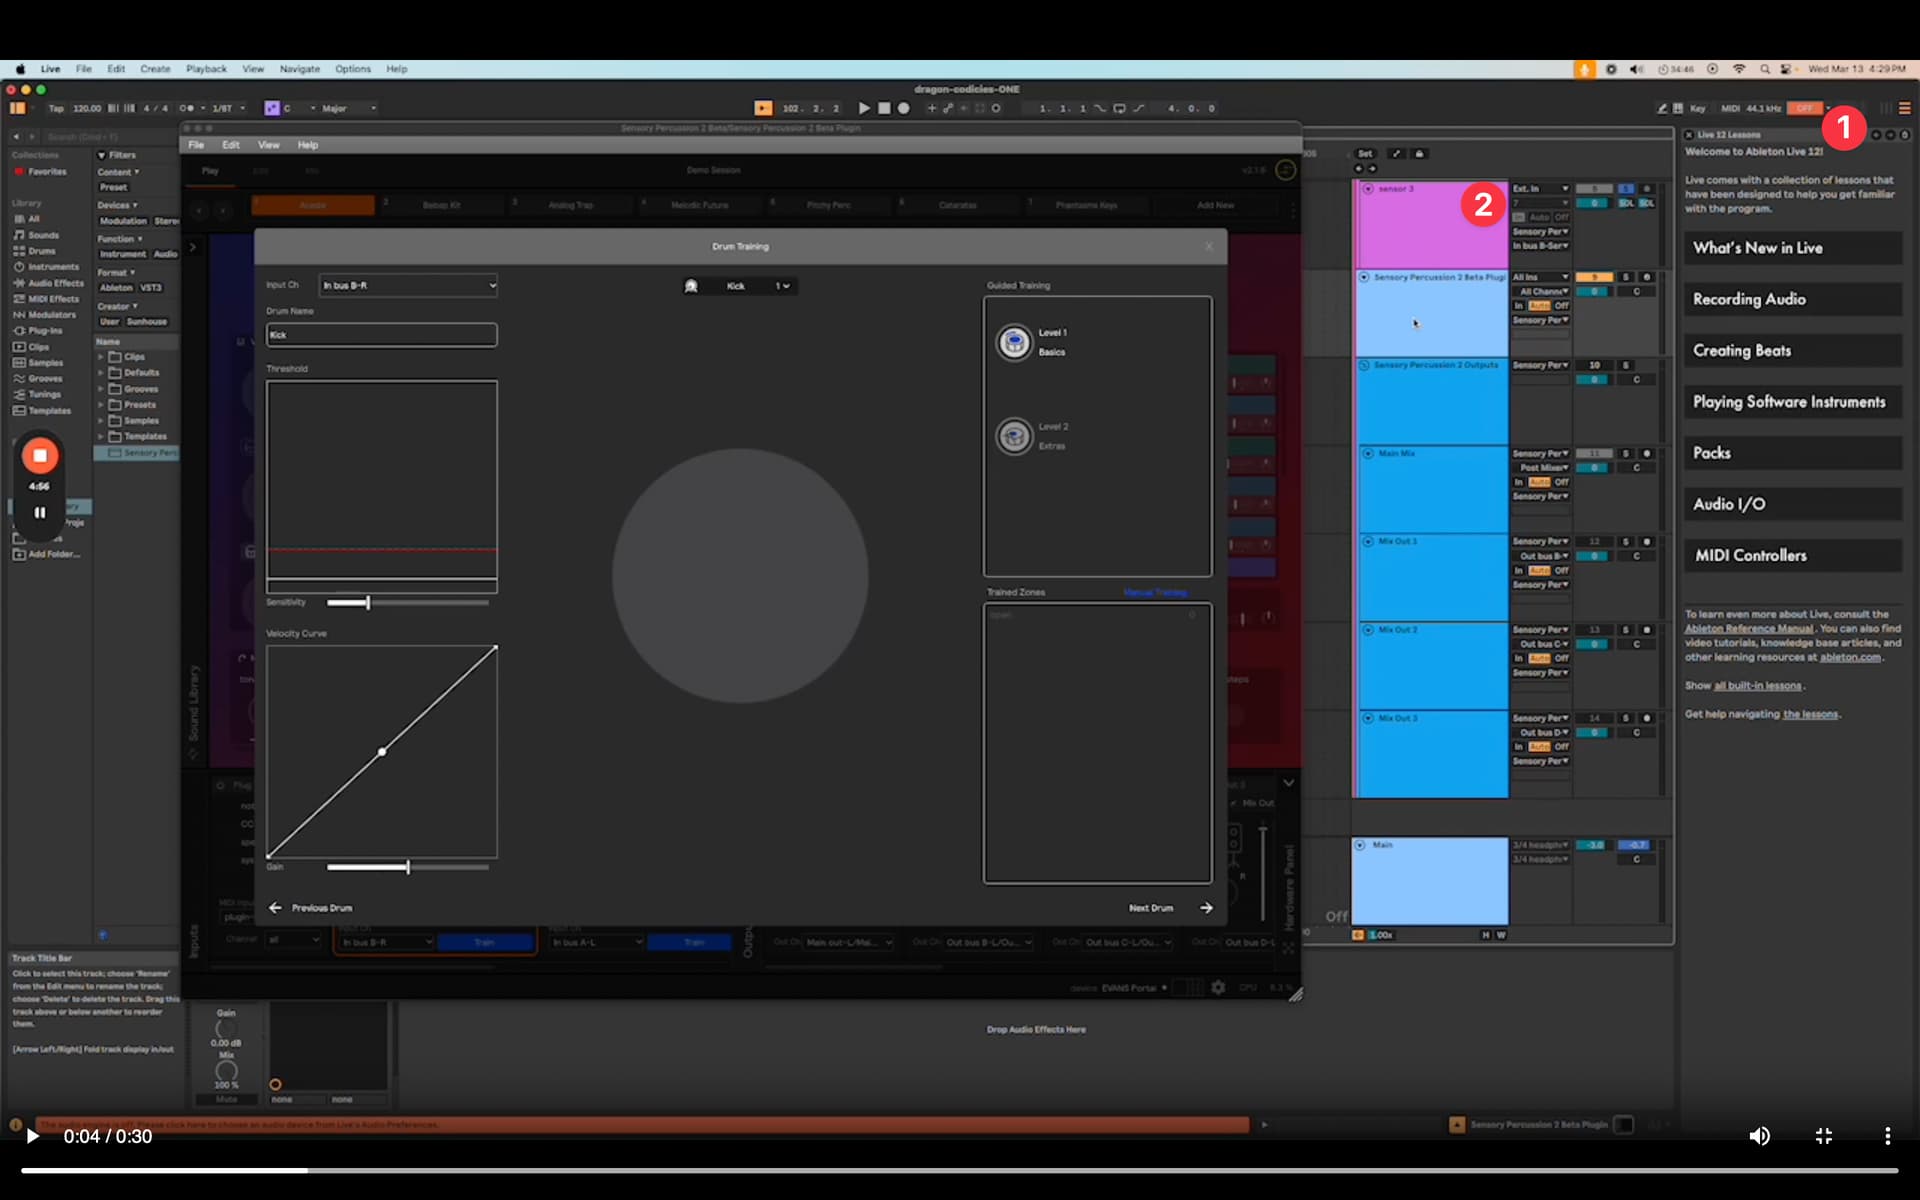
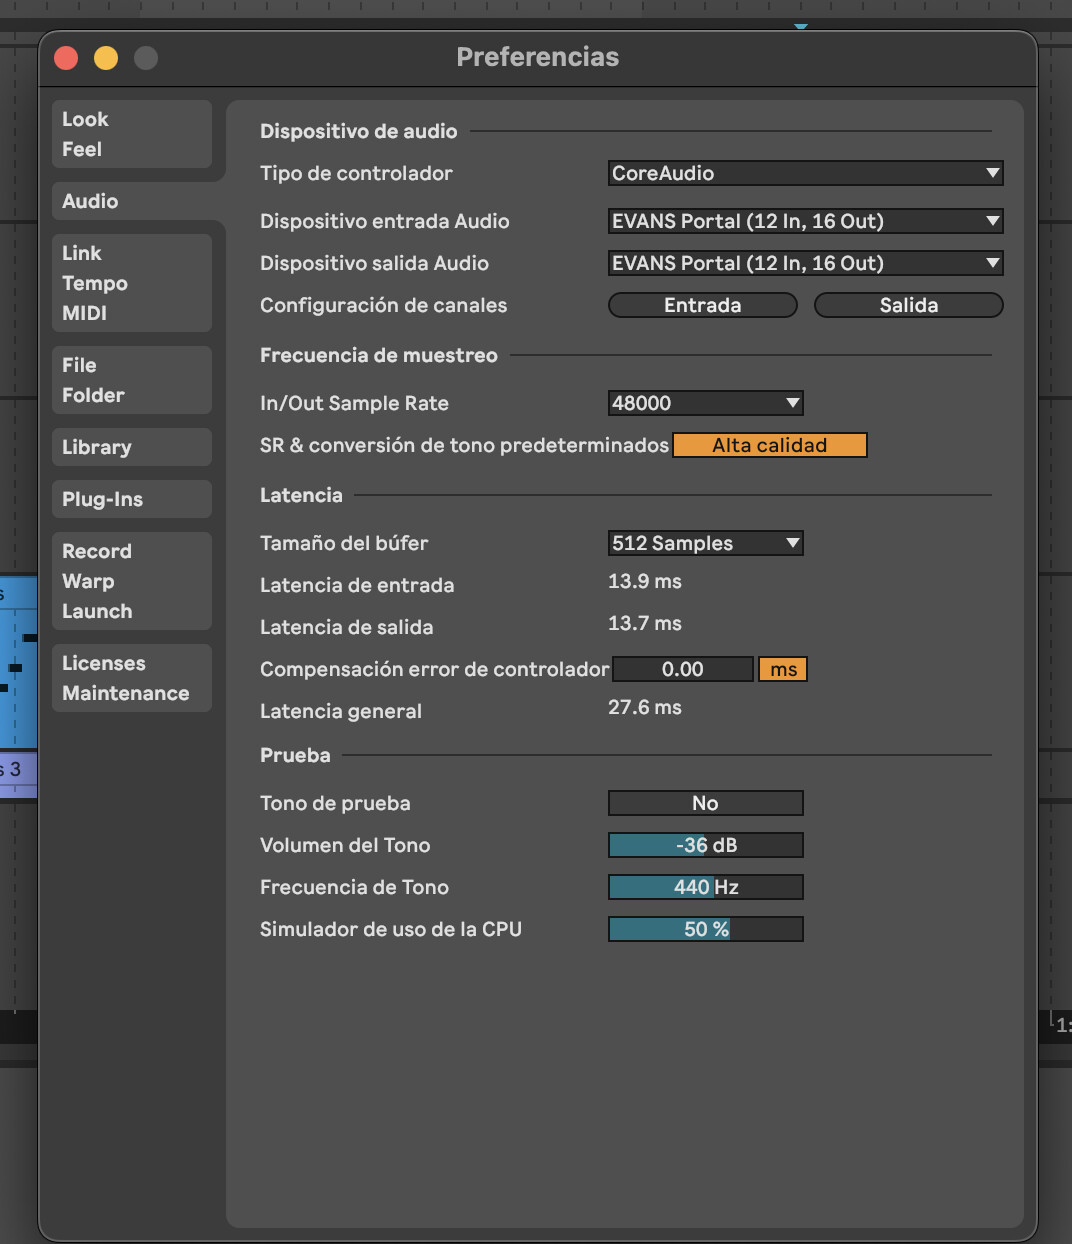
Thanks for providing this screen recording; it helps a lot. The first thing I notice is the orange “OFF” warning in the top-right corner of your Ableton session (labeled #1 in the screenshot below). This means that you have “No Device” chosen as your audio output in Ableton’s audio settings. So you won’t be able to get sound from any track, regardless of whether you’re using the SP plugin. When “No Device” is selected, it also disables all input channels, which is why the input to the “sensor 3” track is greyed out (labeled #2 in the screenshot below).
To fix this, in the top menu bar, if you go to Live > Preferences (or press [⌘] + [,] on your keyboard), you’ll open the Preferences window. Here, you’ll want to change your audio input and output device to the EVANS Portal. You can see this process of setting your inputs/output around the 1:30 mark of our plugin walkthrough video.
That should be all you need to do to get going, but if you see that the dropdown with the number 7 on the track named “sensor 3” (labeled #2 in screenshot above) is still greyed out, you might need to activate those inputs in the Preferences window. To do this, you’d go back to the Preferences window, click on “input config,” and activate the inputs you want to use, like this, for example:

The Portal inputs follow this channel list, so that’s why sensor 3 is input 7, for example.
I also see that you have the “sensor 3” track solo’d. I would suggest that you un-solo it while you’re training so you can more easily match the drums to the inputs in the plugin.
In general, orange warnings in Ableton are calling your attention to something important. In your screen recording, the orange bar at the bottom is telling you that the audio engine is off and is prompting you to select an audio output device. In your screen recording, you have the “Live 12 Lessons” tab open on the right side. These are helpful to learn the basics of how to get sound, set up your audio interface, record, etc. I’d suggest starting with the “Recording Audio” section and going through the built-in lessons there. Once you get the hang of recording and playback in general, that will make setting up the SP plugin much easier. I imagine you’ve already seen it, but we have a page in our user manual all about how to use the plugin template
Hopefully that helps, but let us know if you’re still having trouble.
Great, that’s super helpful. I got it working!
Please make the page accessible. It’s not findable via the search currently.
Glad to hear that!
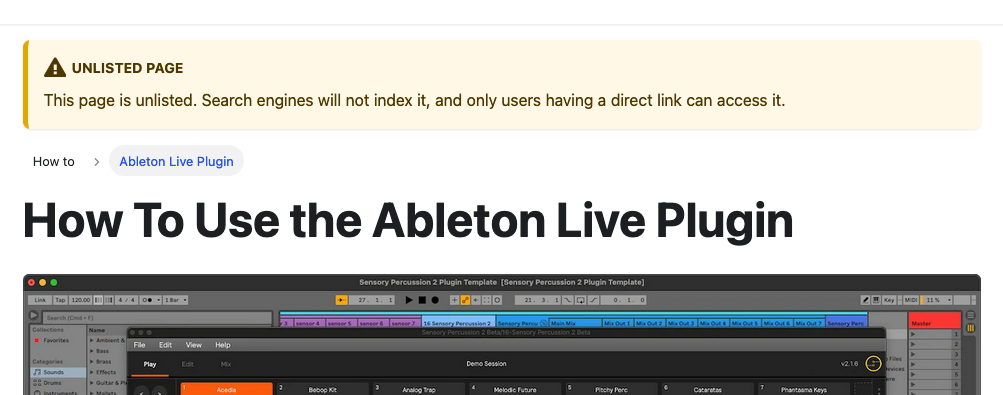
Regarding the unlisted page, we did that intentionally because the plugin is still only available to our Beta users. Once it’s released publicly, we will list the page publicly in the manual. The email that went out with the link to download the plugin also includes links to this page and the walkthrough videos. You can also feel free to bookmark it until the public release.
hi! i was looking for information about a similar issue i’m having,
i’m receiving signal from the sensors in each track in ableton, but the signal is not being received by the SP plugin… i can hear the sounds when i click on the zones, but not when i’m hitting the drums. I routed the sensors both in abelton and SP plugin as instructed, and problem persists.
Maybe Patrick can quickly figure out what i’m missing?
Thanks!
Hi @axelino!
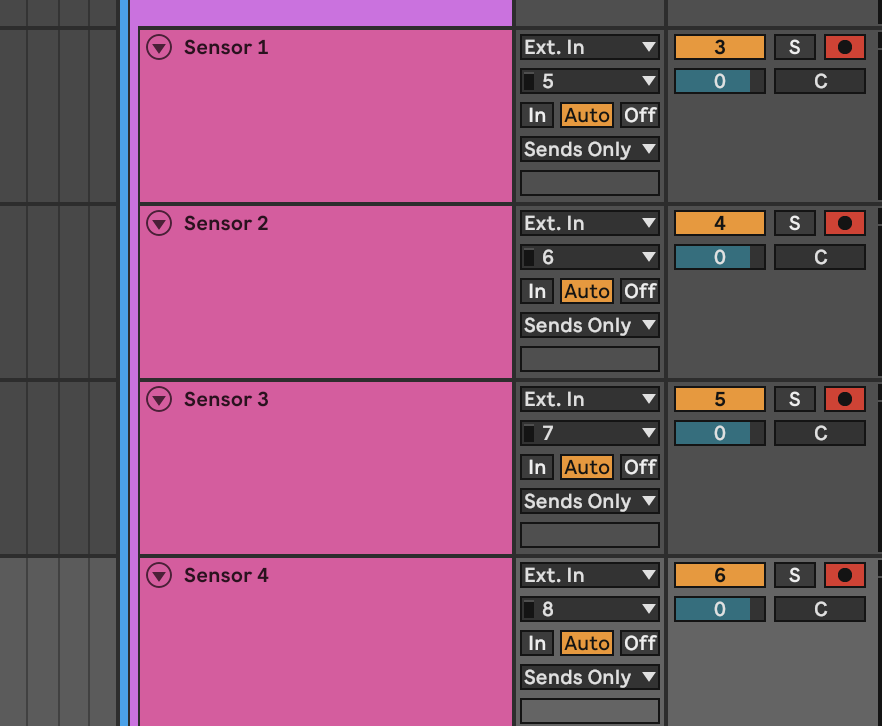
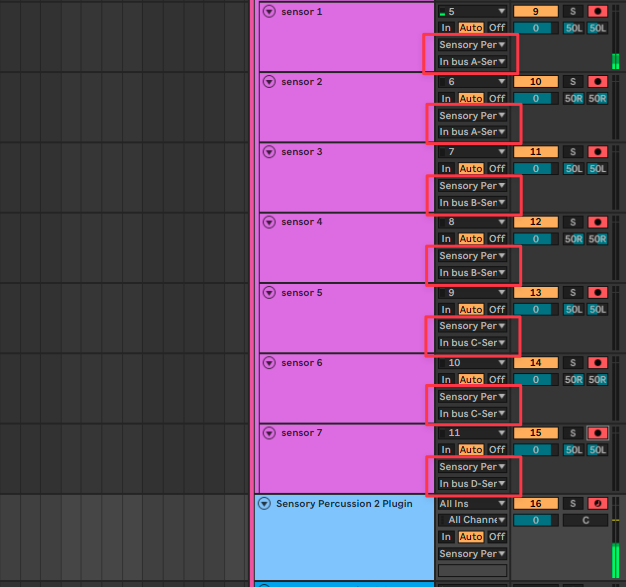
It looks like your sensor tracks are not being sent to the plugin track. In your first screenshot, each of your sensor tracks have their sends set to “sends only”.
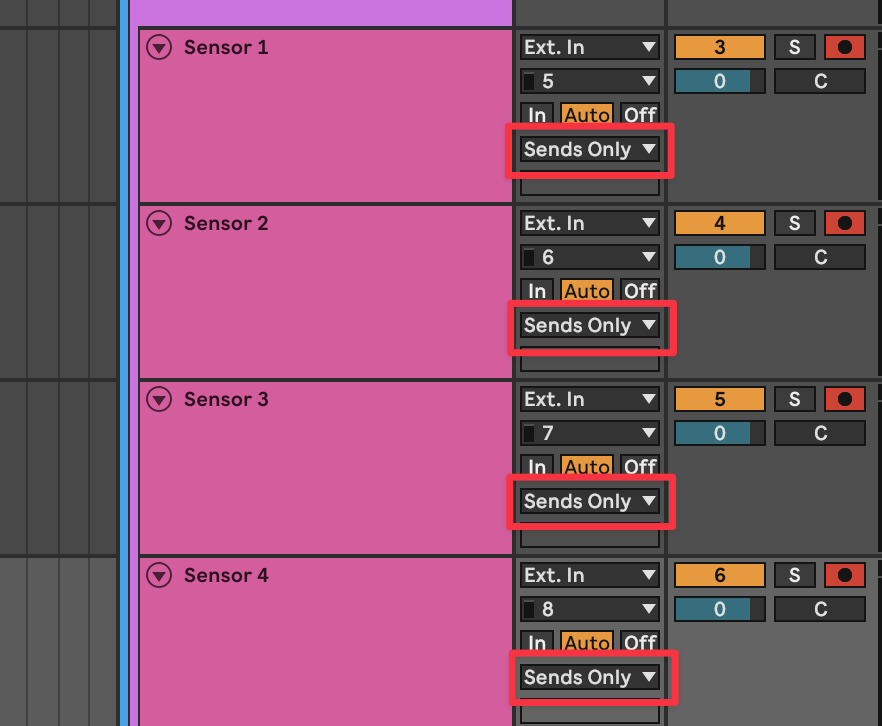
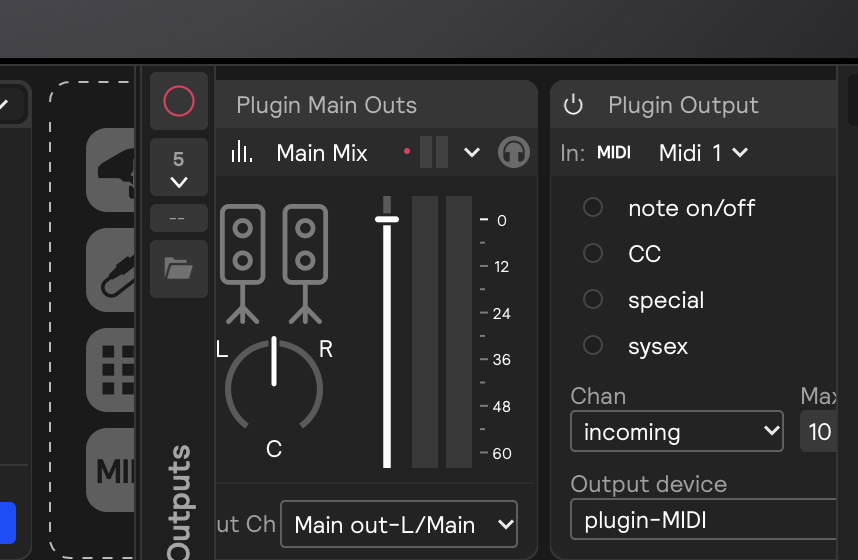
You’ll need to click that dropdown and choose the track named “sensory percussion 2 plugin” instead. Then, for each track, you can click the dropdown below that and set the output channel to “In Bus A,” “In Bus B,” etc. These will match up to the input channels on the hardware inputs that you showed in your 3rd screenshot. Here’s a screenshot of what that should look like:
Hopefully that helps, but let us know if you’re still having trouble!
1 Like
that fixed it! thanks for the prompt and clear reply Patrick ![]()
1 Like